Kanbalone User Guide
Kanbalone is a lightweight kanban tool for personal work, small release planning, and collaboration with AI agents.
This guide follows the order a new user can use to start working.
Quick Demo
This short demo shows ticket creation with Markdown, creating and attaching a tag, drag and drop, search, filters, comments, and List view.
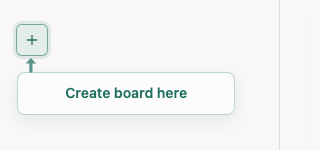
1. Create Your First Board
Click the + in the upper-left sidebar to show the board name input.
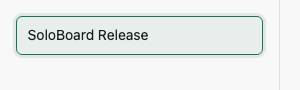
Type a board name and press Enter to create your first board.
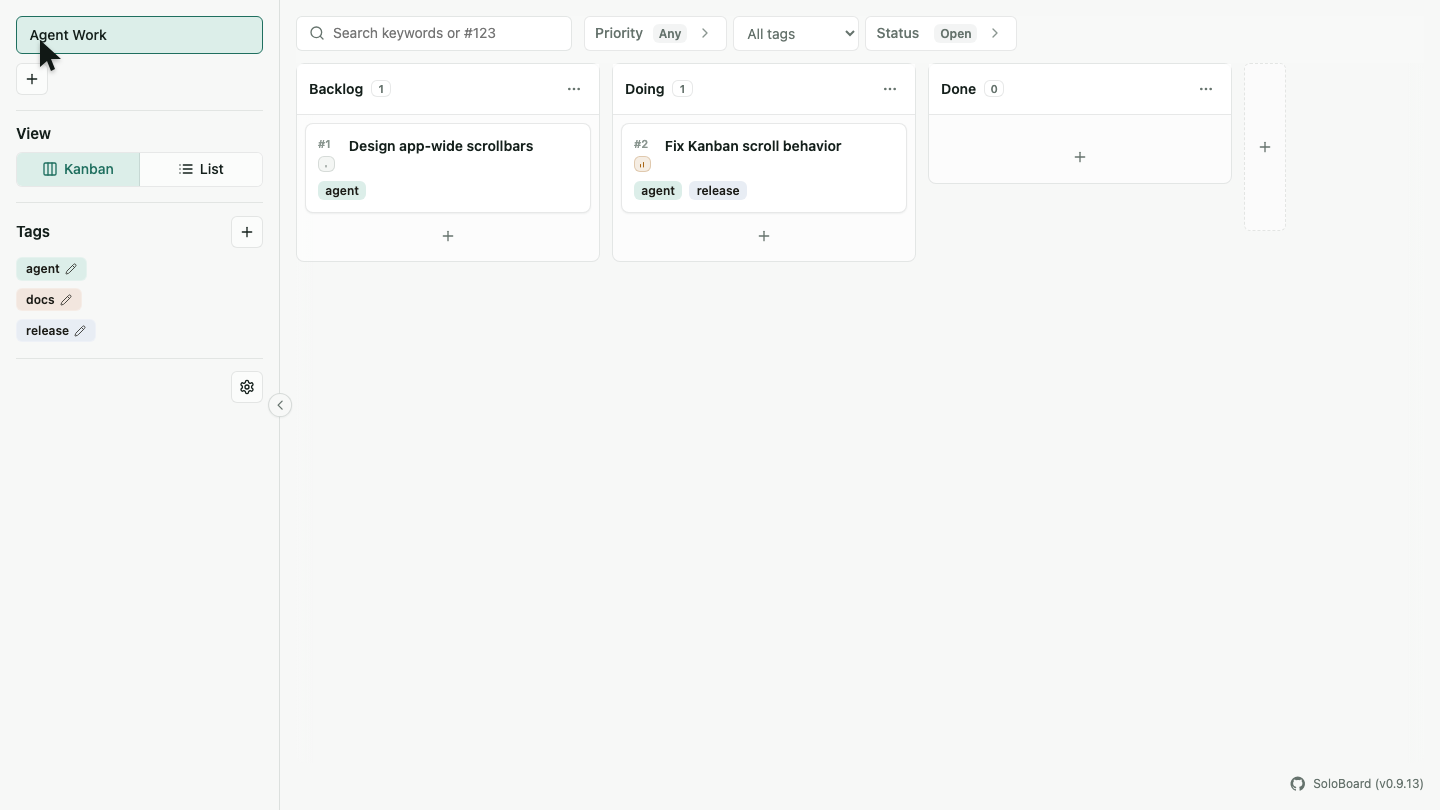
2. Learn The Workspace
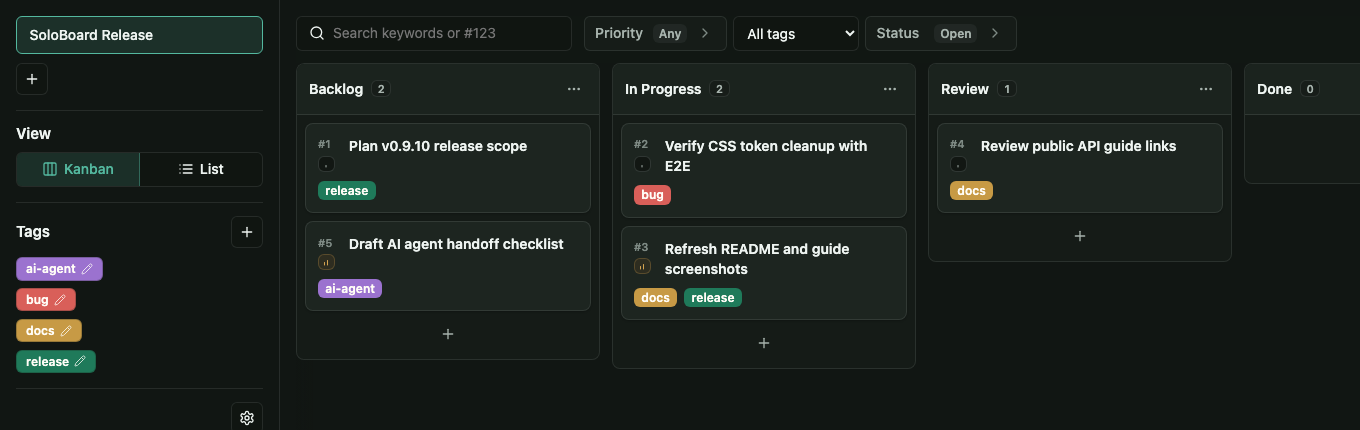
After creating a board, the workspace appears.
Choose a board in the left sidebar and move tickets in the central Kanban area. Use Kanban / List in the sidebar to switch views.
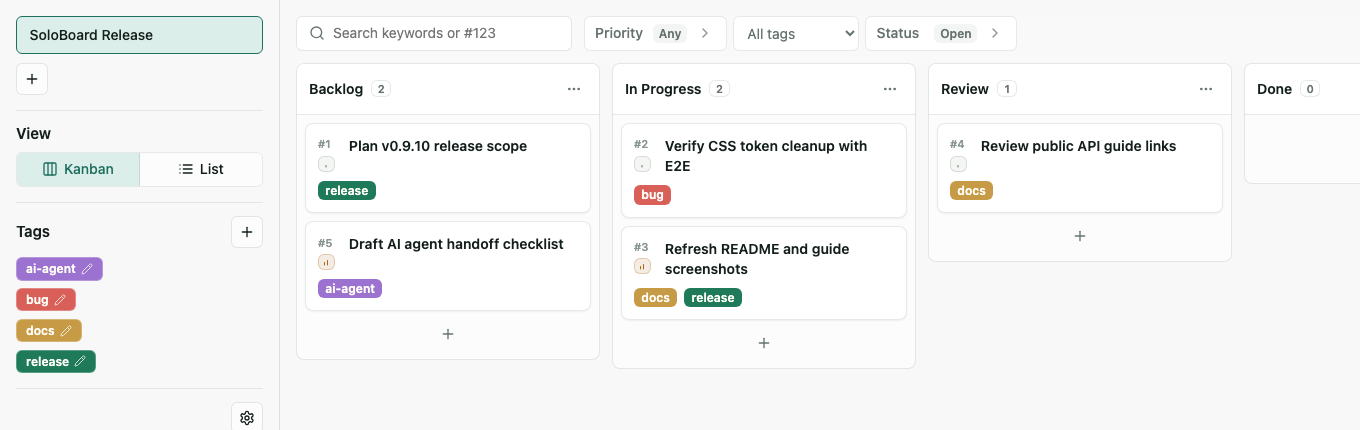
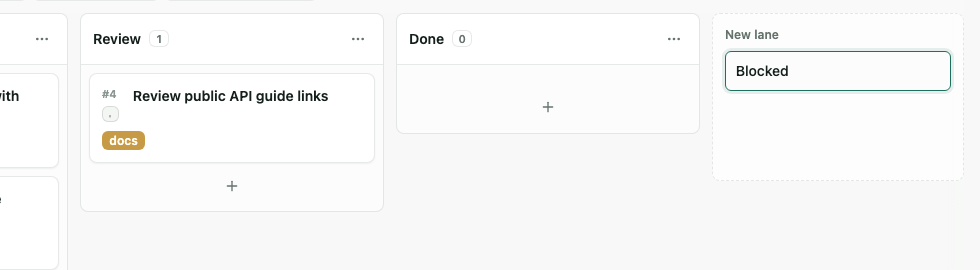
3. Set Up Lanes
Use the + at the bottom of the board to add a lane. Type the lane name and press Enter.
Rename and delete actions are available from each lane's action button.
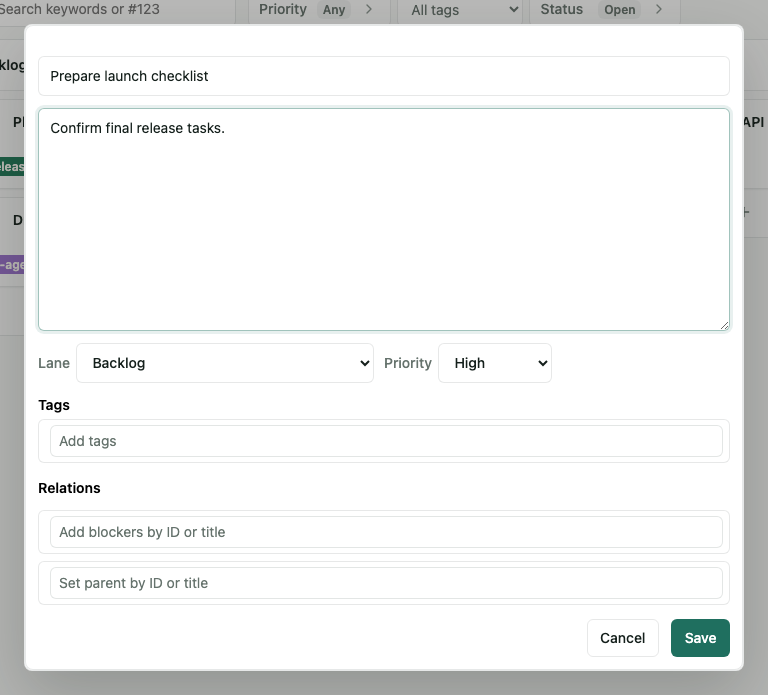
4. Create A Ticket
Use the + in a lane to create a ticket.
Enter a title and body. You can also set Lane / Priority, Tags, and Relations.
Main fields:
- Title
- Body written in Markdown
- Lane / Priority
- Tags
- Relations
Relations let you set blockers and a parent ticket.
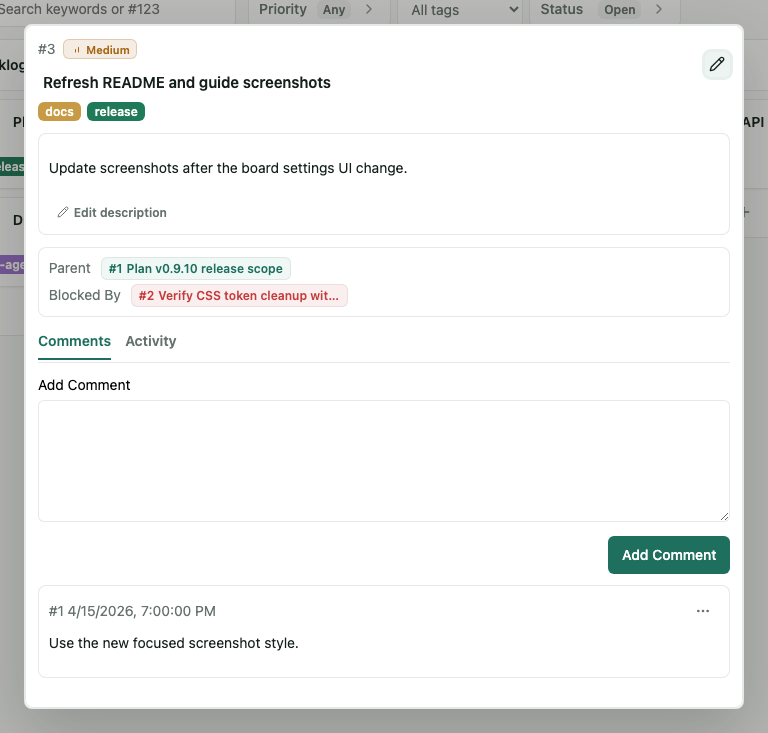
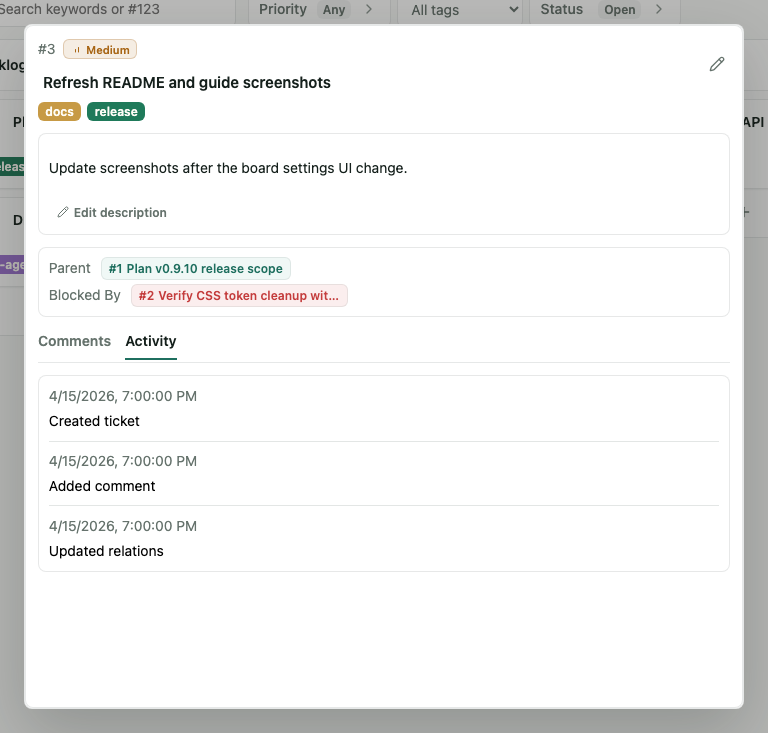
5. Read A Ticket
Click a ticket to open its detail view.
The detail view shows the body, relationships, comments, and activity.
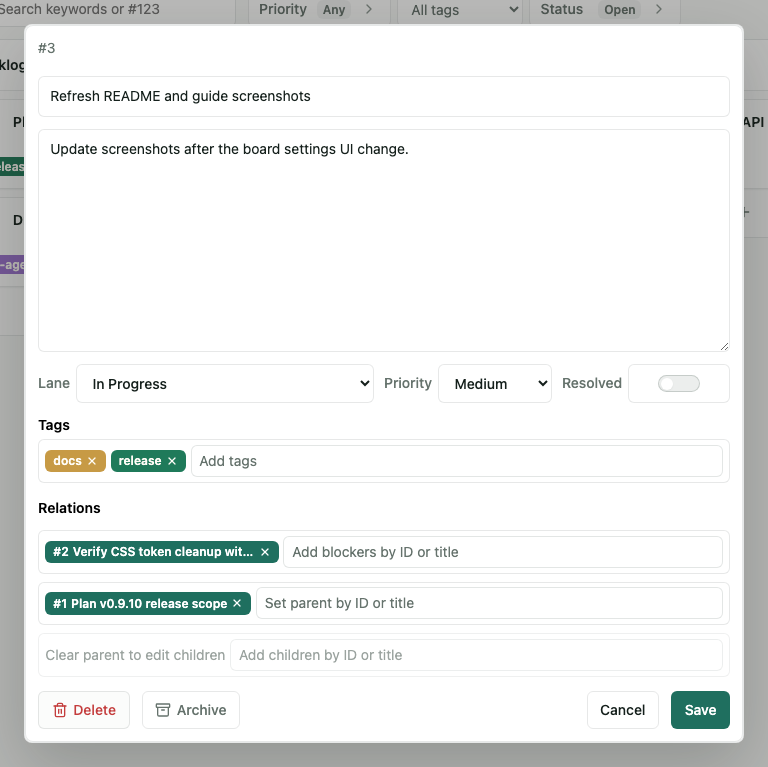
6. Edit A Ticket
Use the pencil icon in the upper-right of the detail view.
You can change Lane / Priority / Resolved, Tags, Relations, and the body.
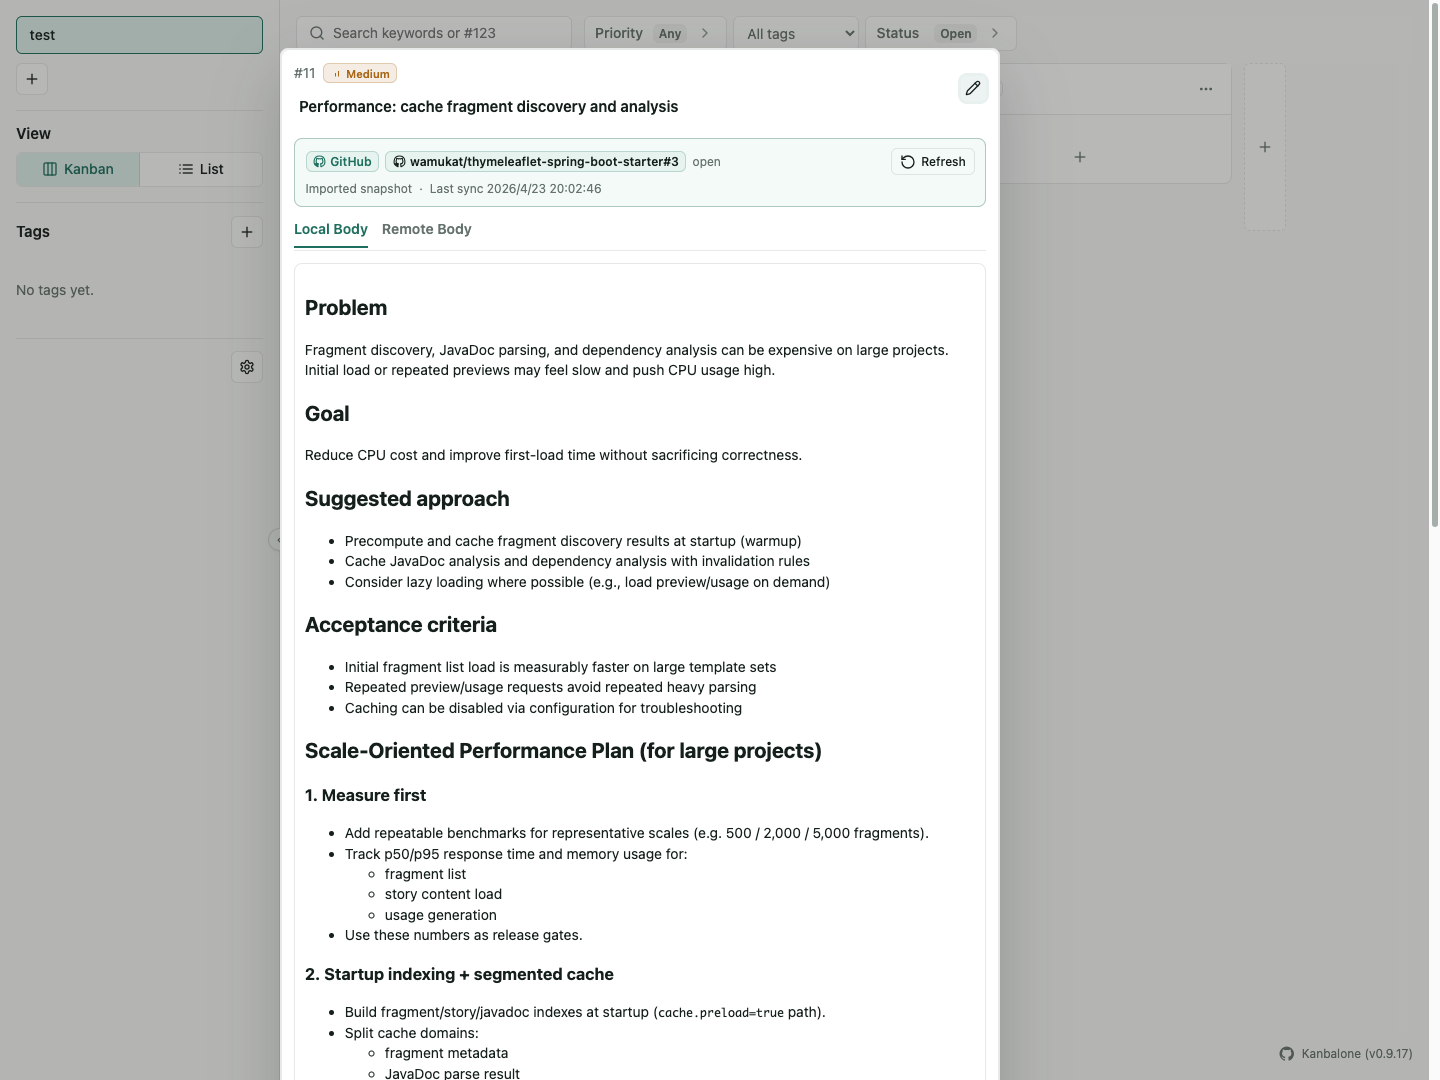
For a remote tracked ticket, the title becomes a remote-owned read-only value. The editable implementation text lives in Local Body.
Relations let you edit blockers, parent tickets, and child tickets.
Use Move in the detail view to move a ticket to another board and lane. Matching tag names are kept. Parent, child, and blocker links are cleared when the ticket moves to another board.
7. Use Comments And Activity
You can leave comments in the ticket detail view.
The Activity tab shows history such as comment creation, updates, and deletion.
For a remote tracked ticket, comments can also be pushed back to the remote issue. When a push fails, the failure details are visible on that comment.
8. Work With Remote Issues
Kanbalone can import remote issues from systems such as GitHub Issues, GitLab, and Redmine and treat them as local execution tickets.
The current implementation supports GitHub Issues, GitLab, and Redmine as providers.
- The remote tracker stays the source of truth for the issue.
- Kanbalone becomes the local execution workspace.
Local Bodyis where you build implementation context for yourself and AI.- Only selected comments are pushed back to the remote issue.

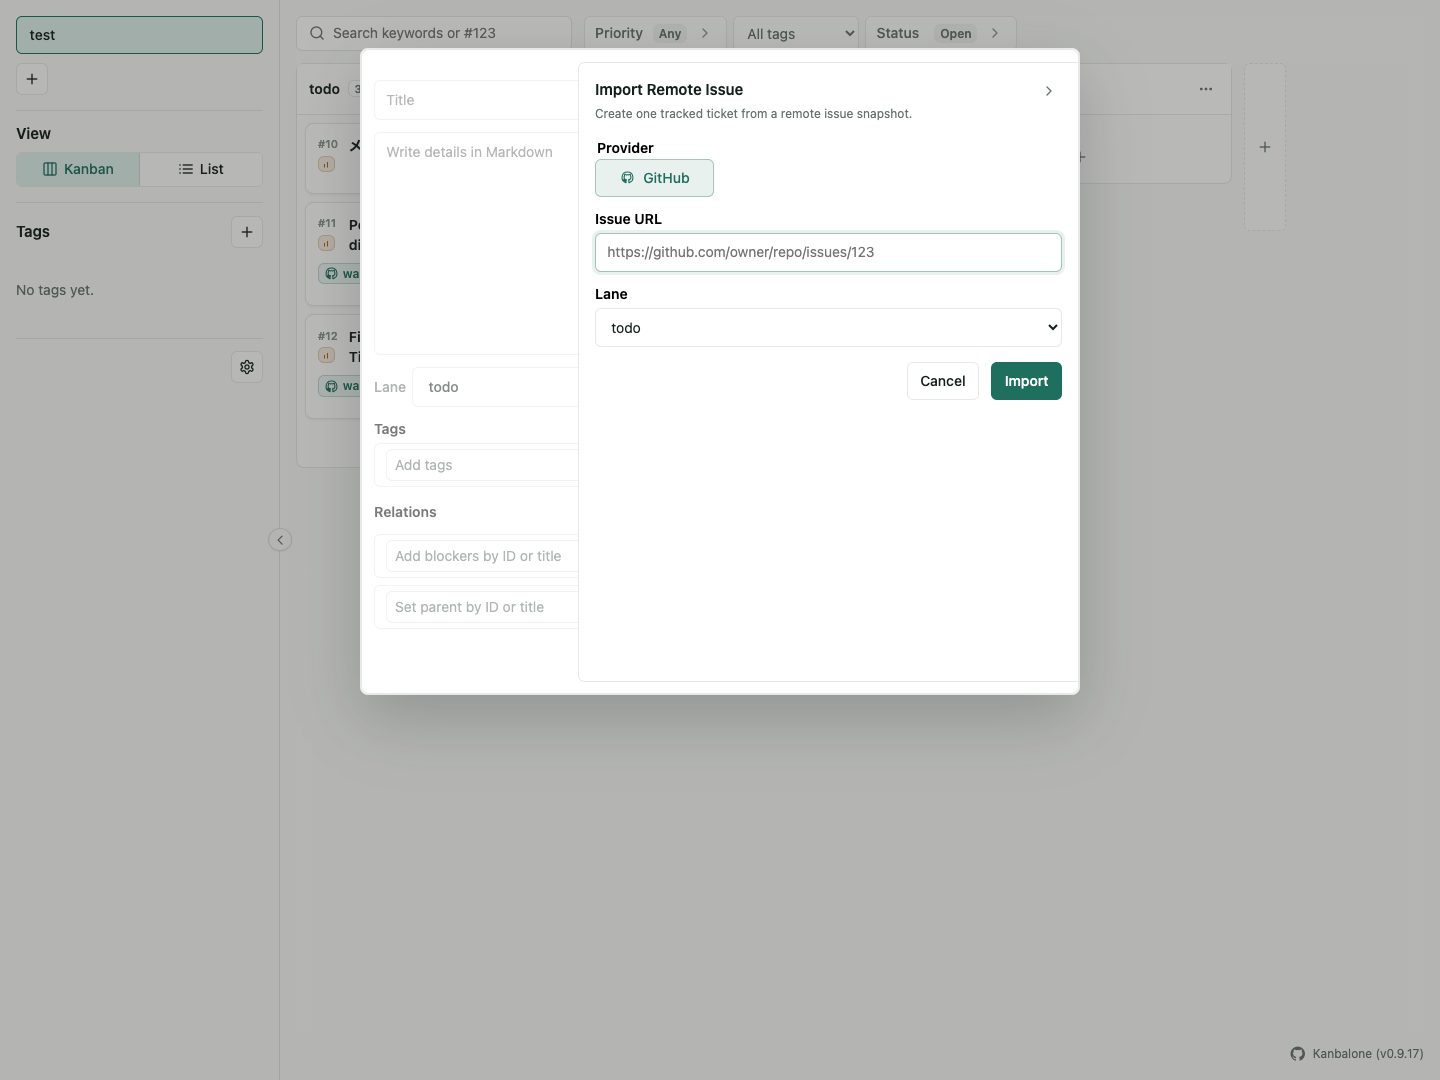
8.1 Import A Remote Issue
Use the import icon in the upper-right of the create-ticket dialog. The icon is shown only when at least one remote provider credential is configured.
The panel asks for:
- Provider
- Issue URL
- Destination lane
Only providers with configured credentials are shown in the panel.
Use KANBALONE_REMOTE_CREDENTIALS or the local sandbox bootstrap when you want to enable GitLab or Redmine locally.
After import, the remote issue appears as a normal ticket on the board.
8.2 Read A Remote Ticket
Remote tracked tickets show a remote reference in the detail view.
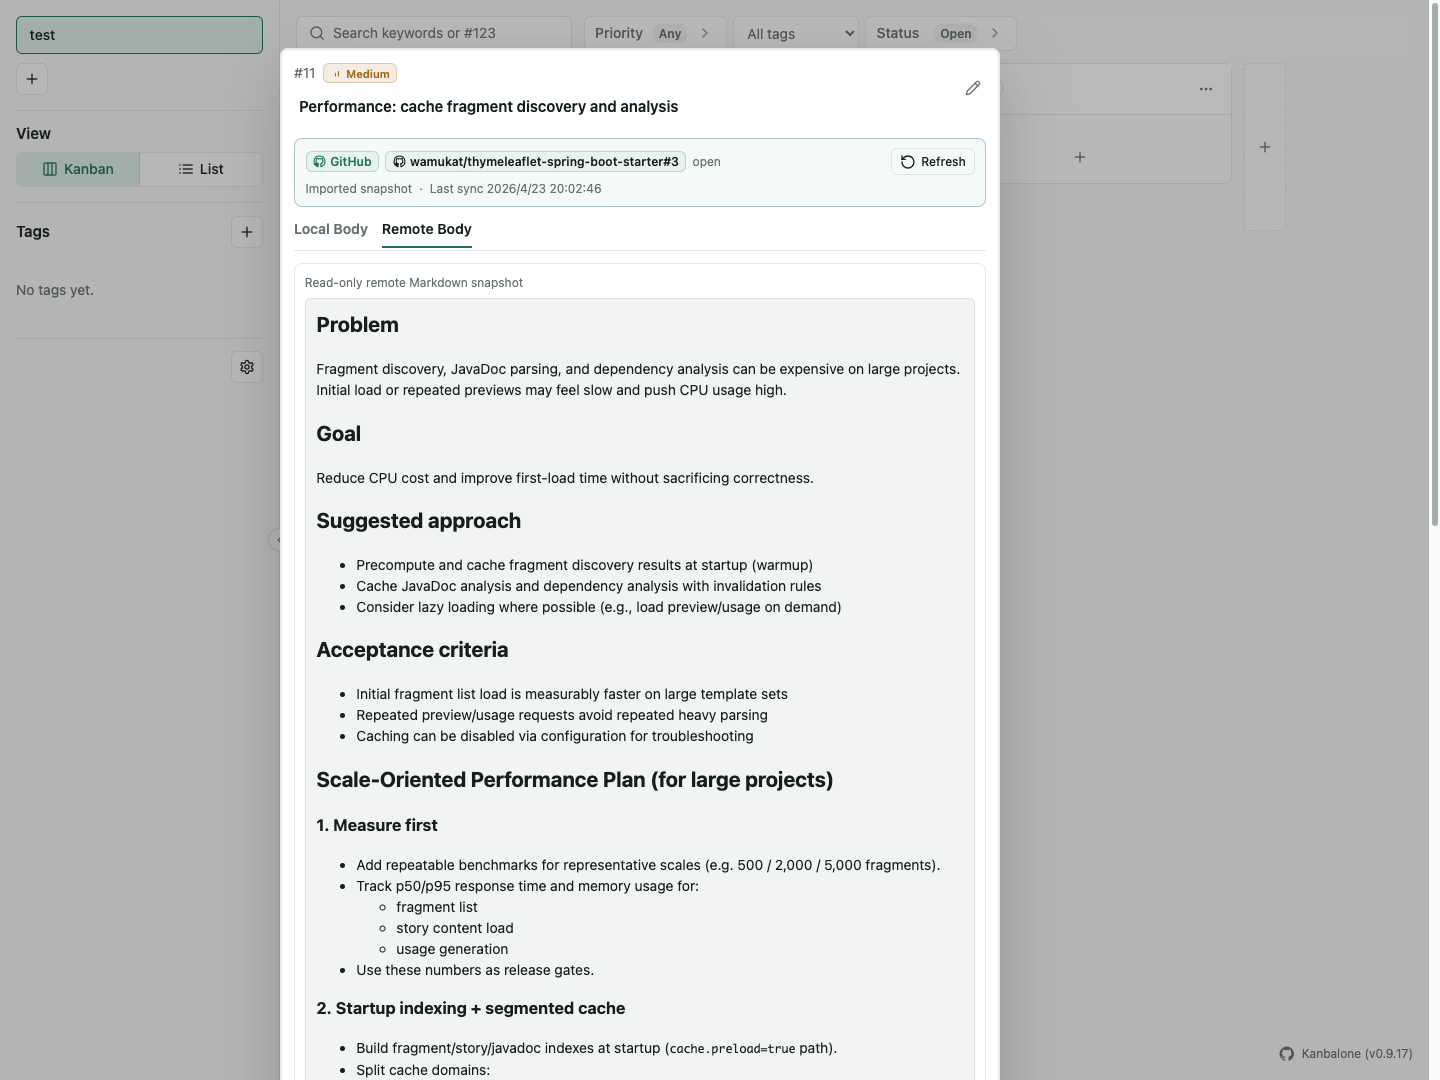
The body is split into Local Body and Remote Body.
Local BodyYour implementation notes, execution plan, and AI-facing working textRemote BodyA read-only snapshot imported from the remote issue
Use Refresh to pull the latest remote title, body, and state.
8.3 What You Can Edit
Editable:
- Local Body
- Lane / Priority
- Tags / Relations
- Comments
Read-only:
- Title
- Remote Body
If the issue requirements change, edit them in the remote tracker and then refresh the ticket in Kanbalone.
8.4 Push Comments Back To Remote
Comments are created locally first.
Push only the comments you want to send upstream with Push to remote.
Comment states:
Push to remoteStill local onlyPushedAlready posted to the remote issuePush failedRemote post failed; click it to inspect the details
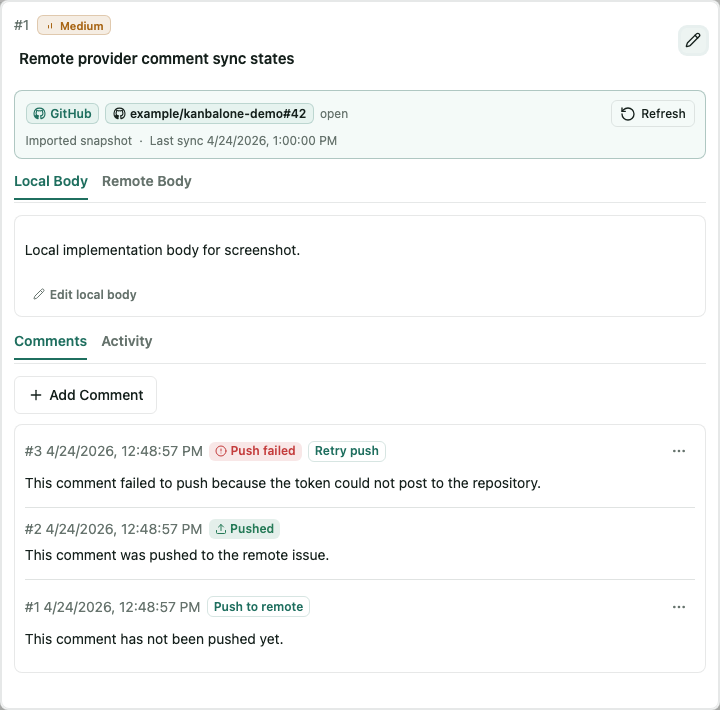
In the MVP, pushed comments cannot be edited or deleted. Add a new comment and push again when you need to correct something.
8.5 Refresh Remote Snapshots
Refresh updates the remote snapshot fields only.
Updated:
- remote title
- remote body
- remote state
Not updated:
- local body
- local comments
- lane / priority / tags / relations
This keeps the remote issue as the canonical requirement while letting Kanbalone evolve its own local implementation context.
9. Resolve And Organize Tickets
You can mark finished work Resolved. You can also move it to a Done lane.
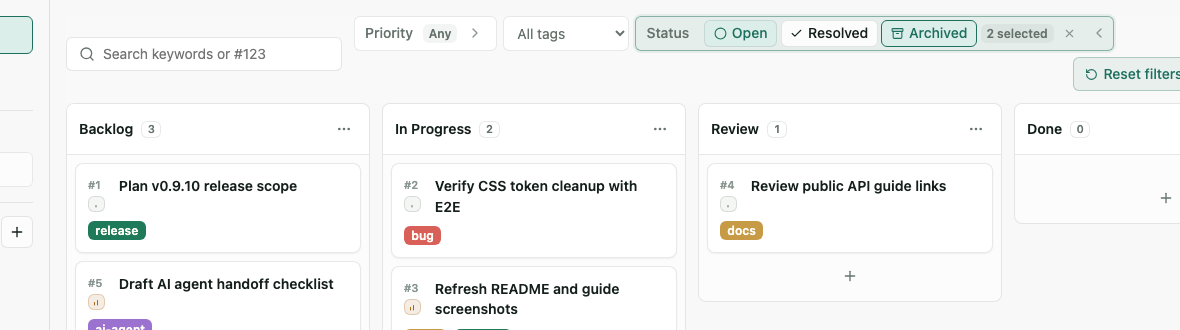
Archive tickets you no longer need to see every day. Archived tickets are hidden from the normal board.
Open Status > to the right of the tag filter and add Archived when you need to include archived tickets. You can add Resolved from the same menu. Use the x icon inside the filter to clear that filter.
10. Find Tickets
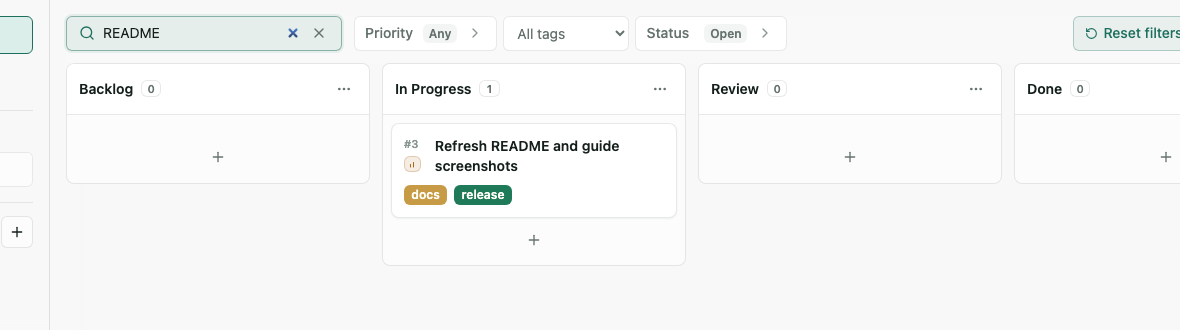
The search field can filter by keyword and ticket number.
- Search title and body with a keyword such as
login. - Search ticket numbers with
#123or123. - Search remote or external references with values such as
gh#123,github#123,ext#123, or the full display ref.
Open Priority > in the filter area when you want to filter by priority. You can select multiple values: Low, Medium, High, and Urgent.
When the search field has a value, use the x on the right to clear it.
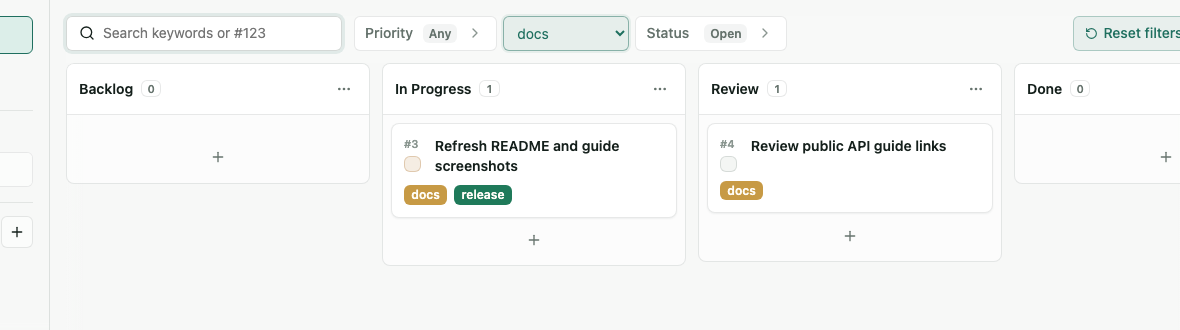
11. Classify Work With Tags
Use the tag filter to show only tickets for a specific theme.
Create tags from the + in the sidebar Tags section. Click a tag badge later to edit its color.
When editing a ticket, type a new tag name in the Tags field and press + to create it as a no-color tag.
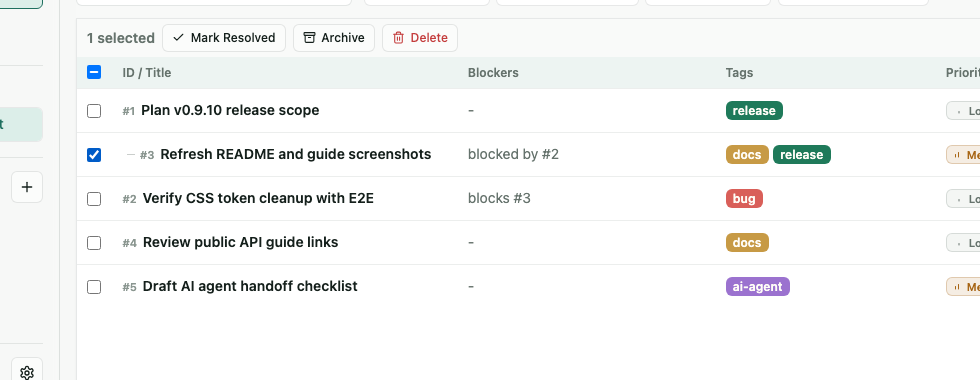
12. Review In List View
Switch to List in the sidebar to review tickets in a table.
List view shows Resolved / Archived state and priority in columns.

Select tickets in List view to show bulk actions.
You can mark multiple tickets Resolved, reopen them, Archive them, or Restore them.
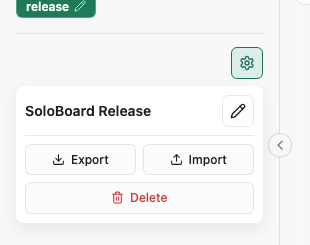
13. Use Board Settings
Board rename, Export / Import, and Delete are available from the gear at the bottom of the sidebar.
Open the gear and click the pencil icon next to the board name to edit the name in place. Press Enter to save, or press Esc / move focus away to cancel.
14. Dark Mode
Kanbalone does not have an in-app Light / Dark toggle.
It follows the OS or browser color-scheme setting. When your system is in dark mode, Kanbalone uses the dark theme.
Try With Docker
docker run --rm \
  -p 3000:3000 \
  -v kanbalone-data:/app/data \
  ghcr.io/wamukat/kanbalone:v0.9.35
Open:
http://127.0.0.1:3000
Data is stored at /app/data/kanbalone.sqlite. With a Docker named volume, data survives container recreation.
Kanbalone does not include authentication. Do not expose it directly to untrusted networks.